How to Store Baby Clothes Long Term
Baby clothes carry a lot of meaning. Some parents store them for the next child. Others keep special outfits for sentimental reasons. Either way, long term storage is different from tossing a bin in the garage. Fabrics can yellow, elastic can weaken, stains can set permanently, and odors can creep in when clothing is stored the wrong way.
At Alliance Storage, we help families store household items for months and years at a time to support our customer’s lives in the best way we know how. Baby clothes can store beautifully long term when you clean them correctly, sort them with a plan, choose the right containers, protect them from moisture and light, and label everything so it is easy to find later.
We also have other helpful guides to help you successfully store furniture and a guide to help students with storage. Ok, now back to our regular scheduled programming.
For those in a hurry
• Sort by size, season, and keep versus donate
• Treat stains before washing and store only fully clean clothing
• Dry completely and cool to room temperature before packing
• Choose breathable or archival materials based on fabric type
• Use airtight containers only when clothing is fully dry and moisture control is included
• Avoid vacuum sealing for knits, elastic, and delicate trims
• Keep clothing off concrete floors and away from exterior walls
• Label by size range, season, and box number with an inventory list
• Recheck stored clothing periodically and refresh moisture control
Decide what you are storing and why
Long term storage works best when you define the goal first.
If you are saving clothes for a future child, you will want practical organization. Sorting by size and season matters more than keeping outfits together.
If you are saving keepsakes, you will want extra protection. Special fabrics, heirloom pieces, and handmade items should be stored with gentler materials and better shielding from light and humidity.
If you are storing everything temporarily while you sort later, plan for a second pass. Clothes stored without a plan often end up stained, wrinkled, and hard to identify later.
Step 1: Sort before you wash
Sorting first saves time and prevents you from storing items you do not want.
Create four piles.
• Keep for future use
• Keepsake items
• Donate or pass along
• Discard
Then sort the keep piles by size. Most baby clothes are labeled in months, but brands fit differently. If you can, sort by approximate fit instead.
A storage friendly way to sort sizes is:
• Newborn and 0 to 3 months
• 3 to 6 months
• 6 to 9 months
• 9 to 12 months
• 12 to 18 months
• 18 to 24 months
• 2T and up
If you have seasonal items, make a quick note as you sort. Heavy fleece and winter coats take more space and deserve their own containers.
Step 2: Find and treat stains the right way
Baby clothes often look clean until they have been stored for a few months. Milk residue, spit up, formula, and food oils can oxidize and turn yellow over time. Stain treatment is not optional for long term storage.
Work in bright light and inspect:
• Collar lines and shoulders
• Underarms on older baby sizes
• Front torso area where food lands
• Knees and seat area on crawlers
• Cuffs on sleepers
Treat stains before washing. Heat can set stains, and dryers lock them in.
Good options include enzyme based stain removers designed for protein stains. Apply, gently rub, and allow it to sit based on the product directions. For stubborn yellowing, oxygen based cleaners can be helpful, but test on a small area first for prints and delicate trims.
Avoid chlorine bleach for most baby clothes. It can weaken fibers and damage colors.
Step 3: Wash with long term storage in mind
Use fragrance free detergent if possible. Strong fragrance can turn stale in storage, and some scents attract lingering odors.
Wash baby clothes fully, not in a quick cycle. Use warm water when the fabric allows. Warm water helps remove oils that contribute to yellowing.
Skip fabric softener for long term storage. It can leave residue that changes texture over time and may trap odors.
If clothing is heavily soiled, run an extra rinse. Detergent residue can also cause stiffness and odor in storage.
Step 4: Dry completely and let clothing cool
This is one of the most important steps. Clothing packed while warm or slightly damp can develop odor and discoloration.
Dry clothes fully. If you line dry, ensure fabric is crisp dry, not cool damp.
After drying, let clothing sit at room temperature for at least an hour before packing. Warm fabric sealed into a container can create condensation.
Step 5: Choose the right storage container
There is no single best container for every situation. Choose based on climate, storage location, and how long you plan to store.
Plastic storage bins with latching lids
These are a common and practical choice. They protect from dust and make stacking easy. Choose bins made of sturdy plastic that will not crack in cold conditions. Clear bins help you identify contents quickly, but they let light through, so store them in a dark location or use opaque bins.
Archival boxes for keepsakes
For special outfits, christening gowns, handmade sweaters, and sentimental items, acid free archival boxes and tissue offer excellent protection. These materials reduce yellowing and fabric breakdown over long periods.
Garment bags for select items
If you are storing a few delicate pieces, breathable garment bags can work, especially when hung in a protected space. They are less ideal for long periods in damp environments.
Avoid cardboard boxes for long term storage
Cardboard absorbs moisture, breaks down over time, and can transfer odors. It can also attract dust and create a musty smell in humid conditions.
Step 6: Decide whether vacuum sealing is appropriate
Vacuum bags can save space, but they are not ideal for everything.
Avoid vacuum sealing items with:
• Elastic waistbands
• Knit fabrics that can stretch
• Delicate lace or embroidery
• Puffed jackets and insulated items
• Items you want to keep in pristine shape
Compression can crease fabric permanently and deform trims. Vacuum storage can also trap moisture if clothing is not perfectly dry.
Vacuum sealing can be acceptable for plain cotton items when space is limited, but use it selectively and avoid keeping items compressed for years.
Step 7: Add odor and moisture protection safely
Long term storage is mostly about controlling moisture and preventing stale odors.
Use moisture absorbers designed for enclosed spaces. Place them where they will not touch fabric directly. Replace them according to the package schedule.
Avoid mothballs. They leave a strong odor that is difficult to remove and they are not appropriate around baby items.
If you want a gentle scent, do not use perfume sprays or scented dryer sheets inside bins. Scents can become harsh over time. If odor control is needed, focus on cleanliness and moisture control.
For keepsake storage, acid free tissue paper is useful between layers. It reduces friction and helps prevent creases.
Step 8: Fold and pack to prevent creases and damage
Fold clothing neatly and avoid overstuffing bins. Overpacked containers crush fabric and increase wrinkling.
A reliable packing method is to roll smaller items like onesies and sleepers. Rolling reduces deep fold lines.
For dresses, special outfits, and items with decorative details, fold loosely and use acid free tissue to pad folds and prevent hard creases.
Do not store shoes with clothing. Rubber and adhesives can off gas and cause odors.
Step 9: Label like you will thank yourself later
Labeling is what makes long term storage usable.
Use labels that include:
• Size range
• Season
• Clothing type
• Box number
Example label format:
Box 3
6 to 9 months
Fall and winter
Sleepers and pants
Create a simple inventory list for each bin. A paper list taped inside the lid works well. A digital list on your phone is also useful, especially if you store multiple bins.
If you are storing in a unit, keep a master list so you know which boxes you need when it is time to retrieve.
Step 10: Why a Storage Unit Is Better Than Storing Baby Clothes at Home
Where baby clothes are stored long term matters just as much as how they are packed. Many homes do not provide stable conditions for fabric storage over months or years. Temperature swings, moisture, and everyday household activity all increase the risk of damage.
Common problems with storing baby clothes at home
Many families default to storing baby clothes in attics, garages, or basements. These spaces often seem convenient, but they create several long term risks.
Attics experience extreme heat during warmer months. High temperatures accelerate fabric breakdown, causes to yellowing, and can permanently weaken elastic and stitching.
Garages are exposed to wide temperature swings throughout the year. Cold winters and hot summers cause repeated expansion and contraction in fabrics, which contributes to stiffness, fading, and odor retention.
Basements often feel cool, but they frequently hold excess moisture. Even mild dampness can lead to musty odors and fabric discoloration over time.
Areas near water heaters, laundry machines, or utility rooms introduce additional humidity and risk from leaks or condensation. Baby clothes stored in these areas are vulnerable even when packed in bins.
Even when clothing is stored in containers, the surrounding environment still affects fabric over long periods.
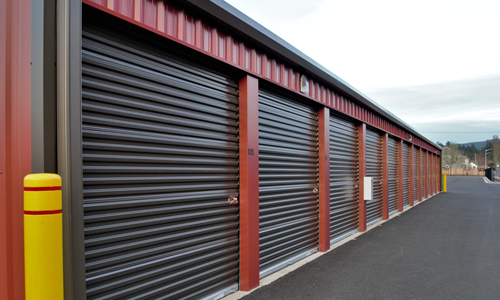
Why a dedicated storage unit is a better solution
A storage unit provides a more stable and predictable environment than most home storage spaces. Units are designed specifically for long term storage, not daily household activity.
In a storage unit, baby clothes can be:
• Stored away from daily temperature spikes caused by cooking, laundry, and HVAC cycling
• Kept out of living spaces where moisture and odors are introduced regularly
• Organized in a way that prevents crushing or constant rearranging
• Accessed only when needed, reducing handling and exposure
Storage units also allow for better layout planning, which helps preserve fabric condition.
How to position baby clothes correctly inside a storage unit
Proper placement inside the unit further protects clothing.
• Keep bins off the floor using pallets or shelving
• Avoid placing containers directly against exterior walls
• Position bins away from direct sunlight near doors
• Stack lighter bins on top of heavier, stable stacks
This setup minimizes exposure to temperature changes and reduces pressure on containers.
A well planned unit layout also makes it easier to access specific sizes or seasons without disturbing the rest of the stored clothing.
Long term protection comes from consistency
Long term fabric storage benefits from stable conditions and minimal disturbance. Storage units offer a more consistent environment than most homes can provide, especially when storing items for several years.
When baby clothes are stored in a dedicated space designed for storage, they are less likely to develop odors, discoloration, or fabric damage and are easier to retrieve when they are needed again.
Step 11: Plan for long term check ins
If you are storing clothing for more than one year, schedule check ins.
Every six to twelve months:
• Open bins and let air circulate briefly
• Replace moisture absorbers if used
• Check for any odor or yellowing
• Confirm labels are still readable
If clothing develops a stale smell, do not mask it. Rewash and dry fully before repacking.
Step 12: How to store keepsakes for decades
If you are storing a few special pieces for a long time, handle them differently.
• Wash gently with fragrance free detergent
• Air dry if possible
• Wrap in acid free tissue
• Store flat in an archival box
• Avoid plastic touching delicate fabric directly
• Keep in a cool, dark, dry location
• Do not stack heavy items on top
This approach reduces yellowing and helps delicate fabrics retain their texture.
Long term baby clothes storage is a process. Sorting, stain treatment, proper washing, complete drying, correct containers, moisture control, and detailed labeling determine whether clothes come out ready to use or ready to discard.
We have two locations for residents. You can find self storage in Corvallis as well as our storage units in Springfield. Both Alliance storage facilities are primed and ready to help you with all of your storage needs.